How it works
eFile is an electronic filing system first launched by the IRS in 1986, allowing you to securely submit tax forms online and replacing the need for mailing paper forms. Today, over 200 million taxpayers use eFile to file their taxes each year!
eFiling supports most popular federal tax forms, and is also accepted by a growing list of states. As of 2023, the IRS mandated eFiling for individuals who need to file 10 or more tax returns.
Signing up for Adams is free - no strings attached! When it comes time for filing, you pay only for what you need. The price for eFiling depends on the number of forms you need to file, and varies for Federal and State forms. More information can be found on our Pricing page.
Add-on services can be purchased for specific forms, making it easy to check, share, or correct just the forms you need, without any hidden charges or surprise costs.
Yes! Our system is SOC 2 compliant, layering network firewalls and AES-256 encryption to ensure your data is always stored securely. We also use military-grade TLS (Transport Layer Security) encryption standards to transmit data, exceeding even the IRS’s own security requirements, meaning you can file your taxes with confidence.
Getting started
Signing up
eFiling
Adding payers
Using the dashboard
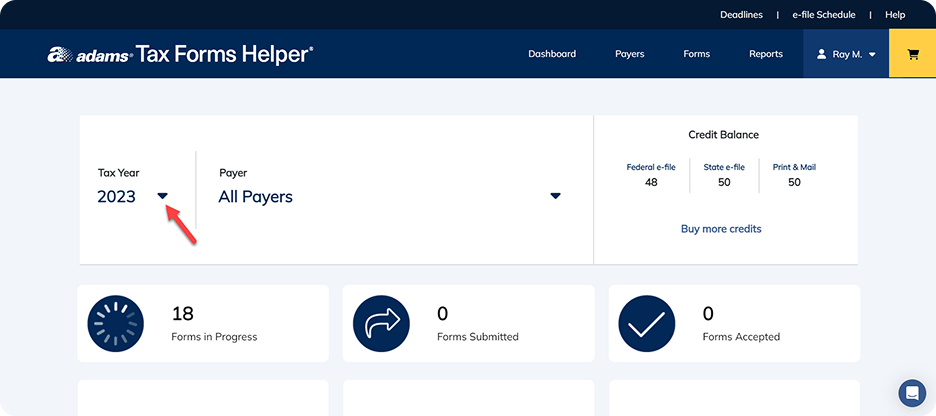
To see your filings from a previous tax year, open the dropdown menu next to the current tax year in your Dashboard, and select the year you want to view.
To view specific forms from a previous tax year, navigate to the Forms page using the navigation bar. Choose a year from the dropdown menu, and view and download your forms as needed.
If you have already created forms in a previous tax year, you can easily add new forms. While these forms cannot be eFiled, corrected, or edited, they can be easily printed for your records.
(Note: This option is only available for years that you have already created forms - the tax year dropdown will not include years that you did not create forms for!)
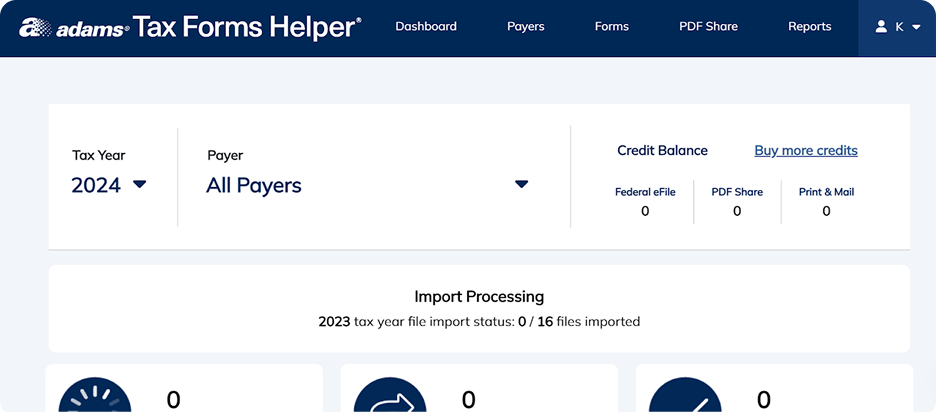
In your Dashboard, open the dropdown menu next to the current tax year and select the year you would like to create a form for.
.png)
Go to the Forms page via the navigation bar. Click the blue “Add New” button to start creating your form. A pop-up will appear warning you that you cannot edit this file once saved - press “Continue”.
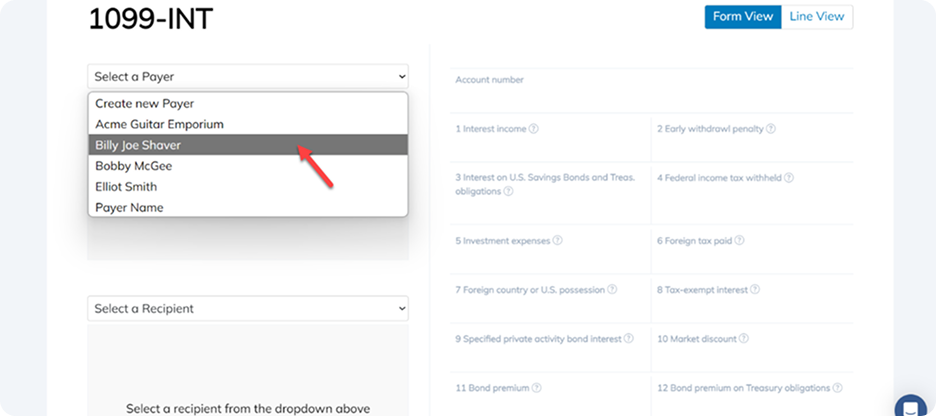
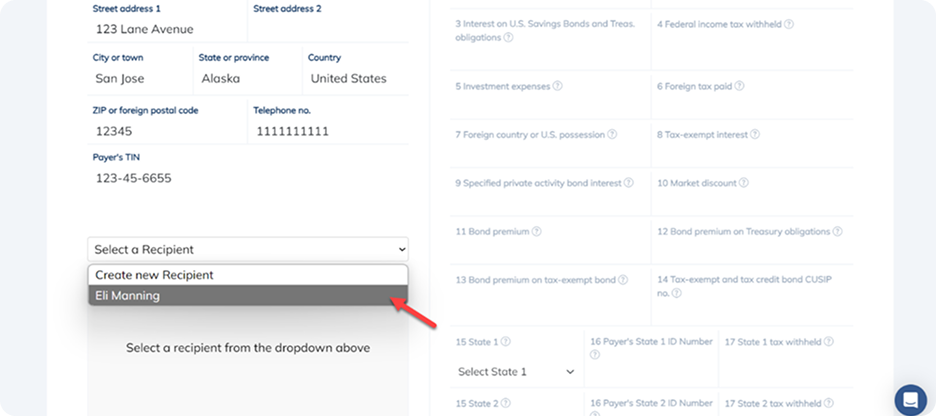
Select the type of form you want to create (e.g. “20XX 1099-INT”), and use the dropdown menus to choose the Payer and Recipient. Enter your data in the appropriate fields and then click “Save”.
Remember: once you click “Save”, you cannot eFile, file a correction, or edit the form, but you can print it for your records.
To create new, blank forms for Payers and Recipients from last year’s filings, click the “Import Prior Year Forms” button in your Dashboard. (Note: If you have previously filed more than 100 forms, this may take a bit of time to process!)
.png)
Next, you’ll see a confirmation screen letting you know that your import is complete. Head to the Forms page using the navigation bar, and you’ll see all of your imported forms listed as “Incomplete”.
.png)
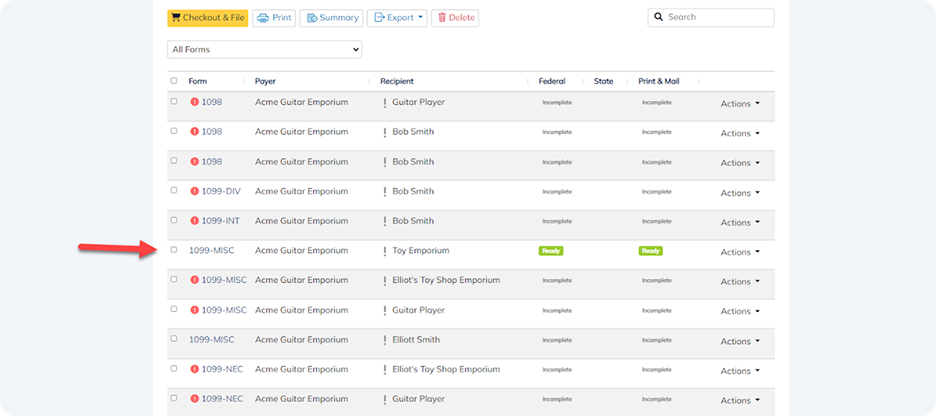
To start editing form details, simply click on the form type (e.g. 1099-MISC). Confirm your changes by clicking the “Save and next” button.
Once complete, your updated form will be labelled “Ready”, allowing you to move to checkout, TIN checks, and eFiling.
Yes!
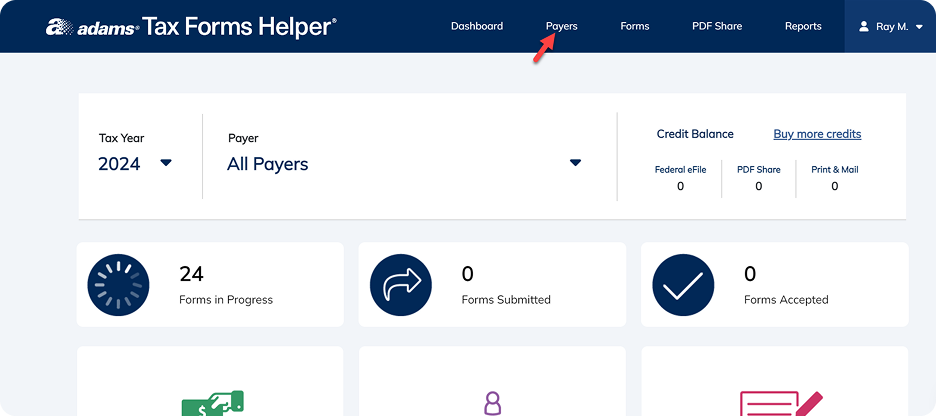
Navigate to the Payers page in the Dashboard, and click the “Import” button.

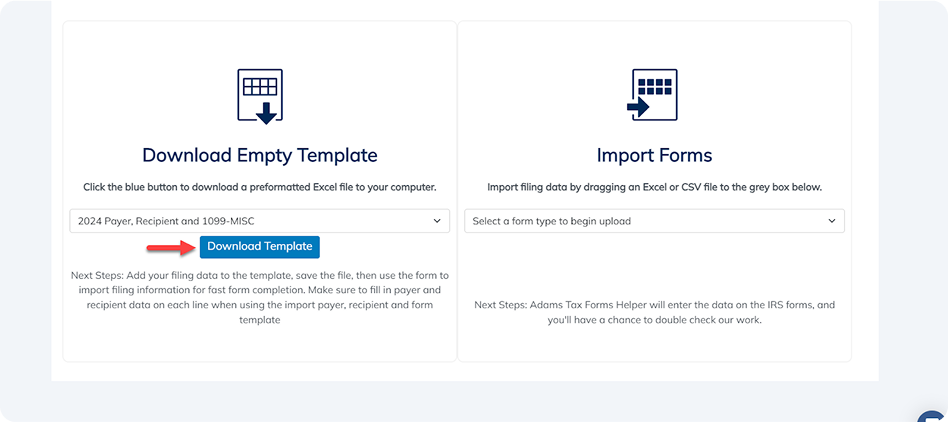
Select “Upload File” from the dropdown menu. Click the blue “Download Template” button to download a blank template file.
Fill in the required areas of the spreadsheet, and upload your completed template by selecting the “Browse Computer” button under Import Payers.
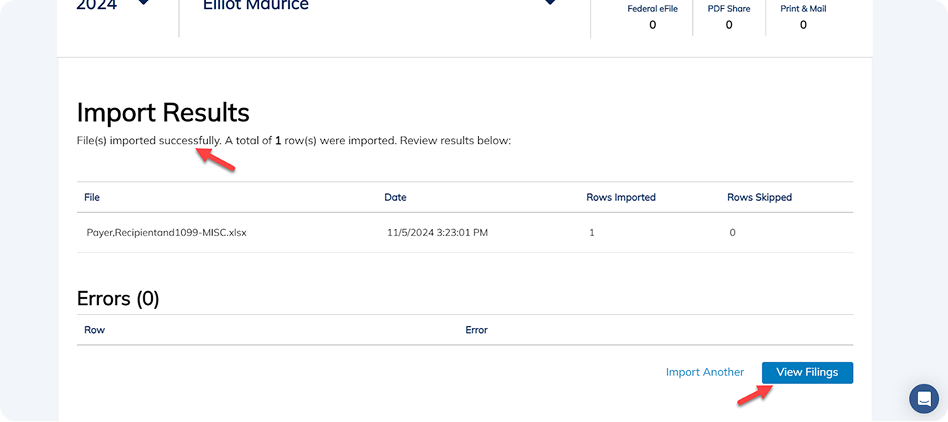
You’ll see the Import Results page when your file has been uploaded successfully.
Select “Import File” under the Create a Form option on your Dashboard.
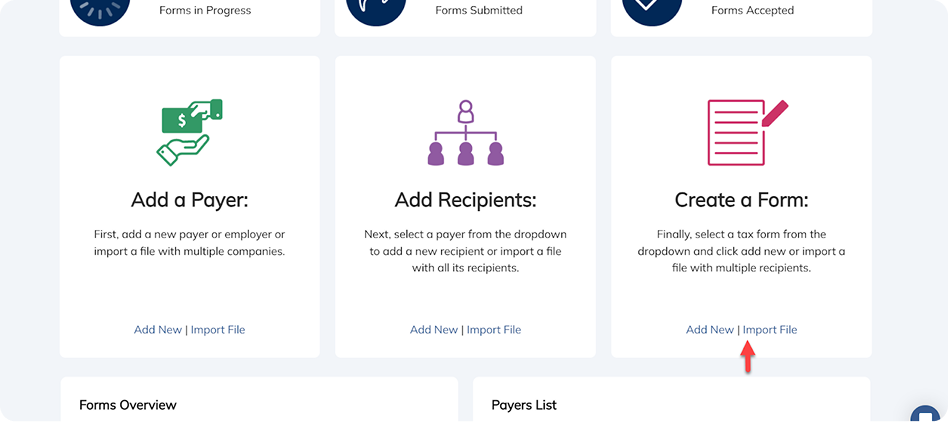
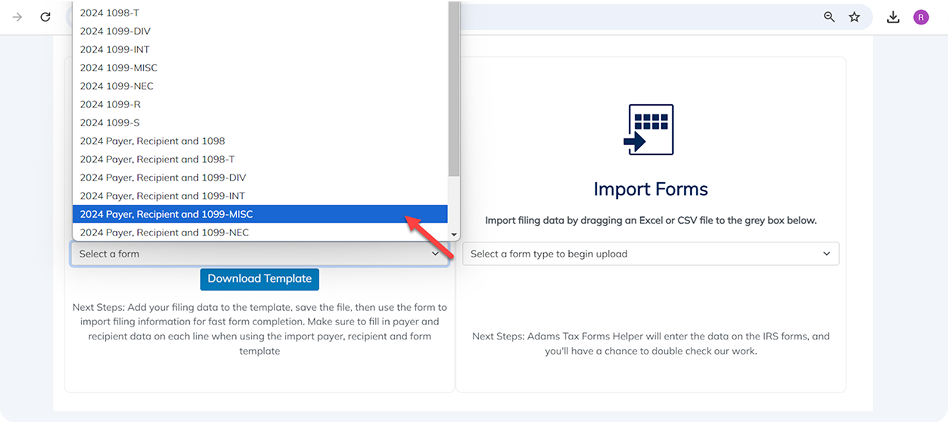
Next, choose the option that reflects the data you are looking to upload from the dropdown menu. You can choose to upload new Payers and Recipients for a specific type of Form (e.g. “Payer, Recipient and 1099-MISC”), or add Forms for existing Payers and Recipients (e.g. “20XX Federal 1099-MISC”). Follow the prompts to download the Excel template.
Add your data to the Excel spreadsheet. If you are uploading only Form details, be sure to match the information for Payers and Recipients already in your account.
Once complete, select your template type from the “Import Forms” dropdown menu, and follow the instructions to upload your Excel or CSV file. You’ll see the Import Results page when your file has been uploaded successfully.
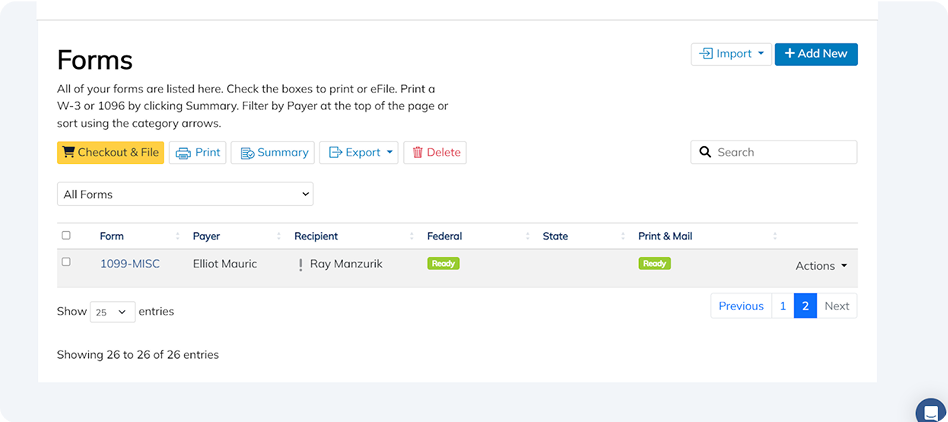
Your new Form(s) will appear in the Form page, ready for the next steps!
If you’ve followed the instructions above, your blank template should start downloading automatically, and will appear in your computer’s downloads folder. If the download doesn't start, check to ensure your browser is set to allow pop-ups and file downloads.
If you’re receiving an error message when you upload your completed Excel or CSV template, check that your file doesn’t contain forbidden characters, or missing columns.
- Check for forbidden characters or typos
- The biggest culprit causing failed imports are extra commas or typos in your data set. Follow the guidance in the gray instruction row to determine whether hyphens, commas or other characters are allowed.
- Keep all empty columns
- Even if you don’t have data for some of the columns, just leave the cells blank, don’t delete them! Our system will recognize empty cells or -0- values and smoothly import your data.
To connect your QuickBooks® Online account and upload Payers and Recipients, go to the Payers page using the navigation bar.
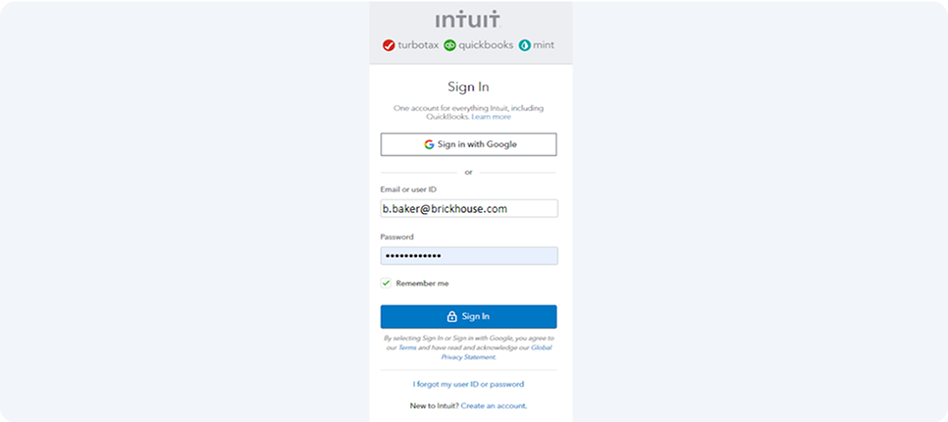
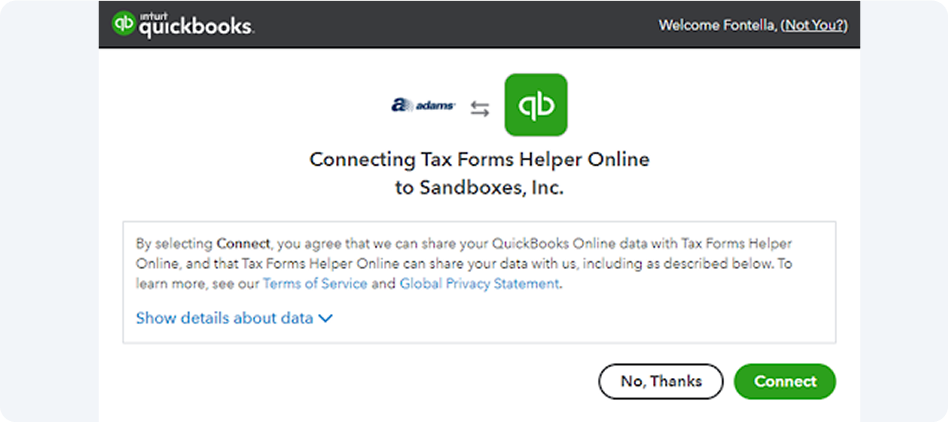
From the “Import” dropdown menu, select “Quickbooks Online”, and then “Sign in with Intuit” to sign into your Intuit account, validating your sign-in if necessary. Click “Continue”, and then “Connect”.

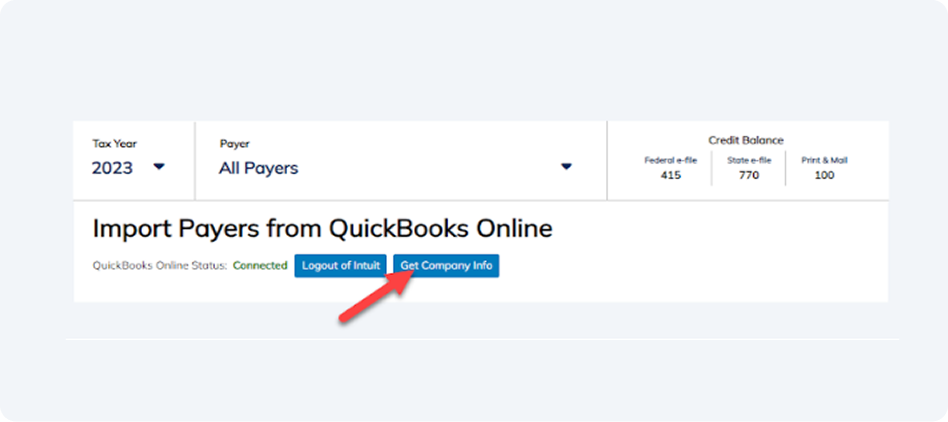
Once your QuickBooks® Online account has been connected, click the “Get Company Info” from your Dashboard. Add your Payer information and click “Save”.
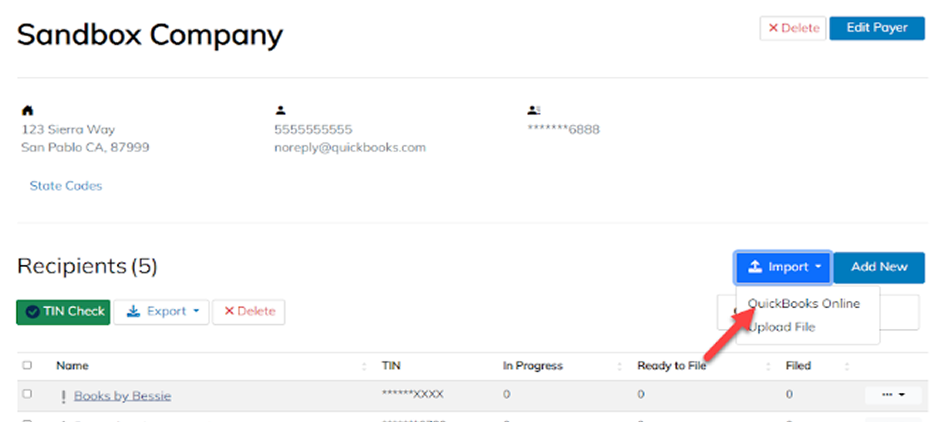
To add Recipients, select “Quickbooks Online” from the “Import” dropdown menu. Check any or all boxes of your Recipients, and then click “Import Selected”.
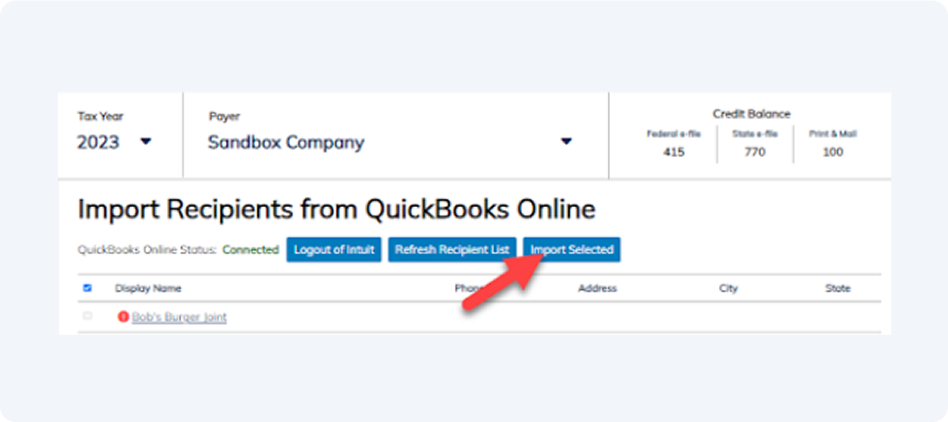
Your imported data will appear in your Dashboard under Payers and Recipients, and can now be used with new form filings.
Yes! Go to the Forms page using the navigation bar and select the Form(s) you want to export as a CSV or Excel file. Click the “Export” button, and select “CSV” or “Excel” from the dropdown menu.

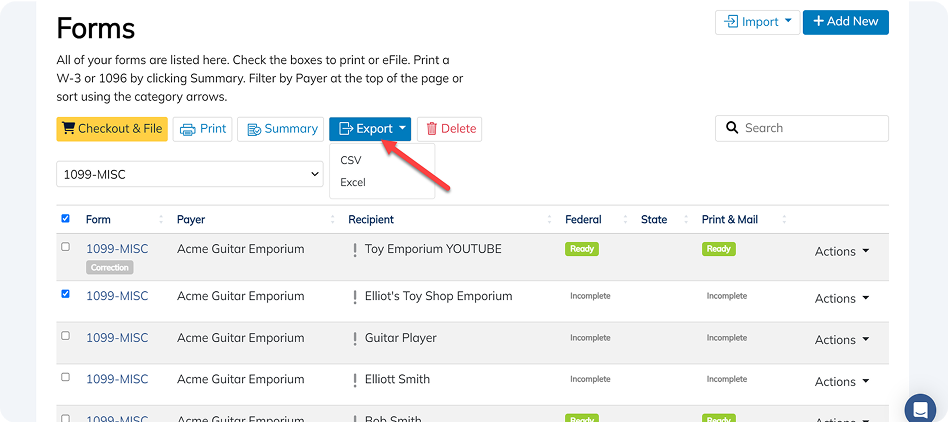
Your CSV or Excel files will start downloading automatically.
Given the sensitive nature of your tax forms, we advise protecting your computer and files with passwords and encryption software, to help secure your data in the event of a stolen device or unauthorized access.
eFiling
You can use eFile to submit your W-2 and W-3 forms to the SSA, and 1099-MISC, 1099-NEC, 1099-INT, 1099-DIV, 1099-R, 1099-S, 1098, 1098-T, and 1096 forms to the IRS. If you have 10 or more forms, the IRS mandates eFiling rather than paper forms.
You can also eFile state tax forms in select states.

Nope! As an authorized eFile provider, we have a pre-authorized transmitter code, so you can skip the hassle and delay of applying for your own TCC and start eFiling right away.
When you’re satisfied your forms are correct, you can start eFiling. Always double-check your forms before you eFile: once your file is transferred electronically, you aren’t able to edit Form details, or update Payer or Recipient information.
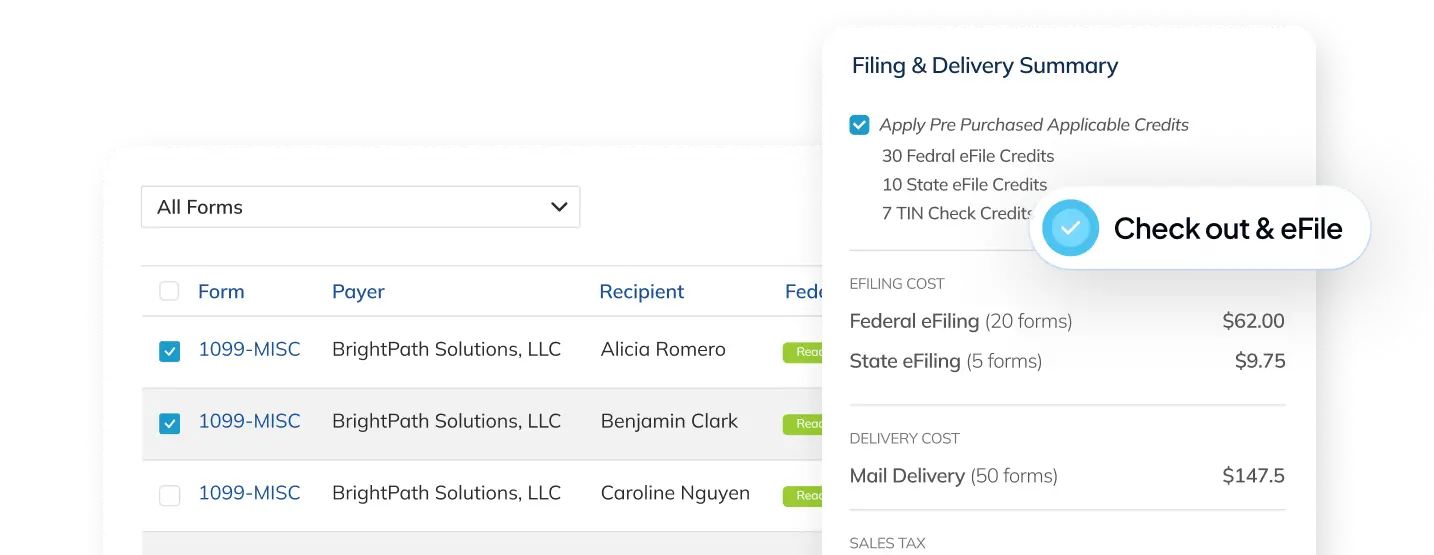
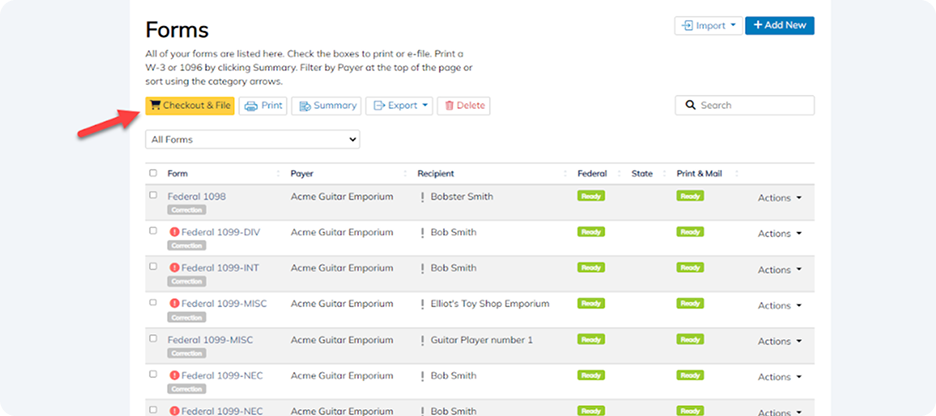
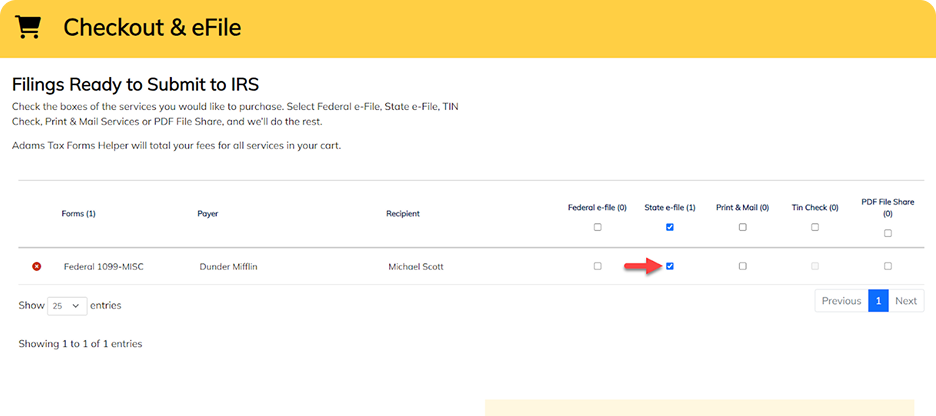
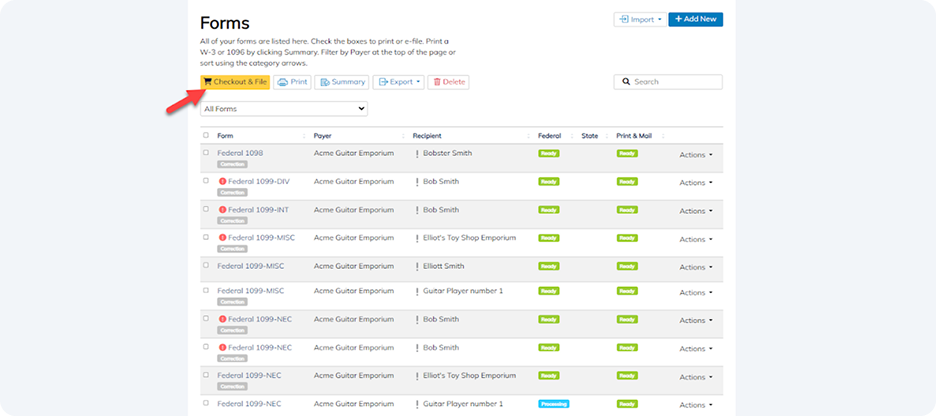
To begin eFiling, go to the Forms page using the navigation bar in your Dashboard. Check the box(es) next to the form(s) you’d like to eFile, and click the yellow “Checkout & File” button.

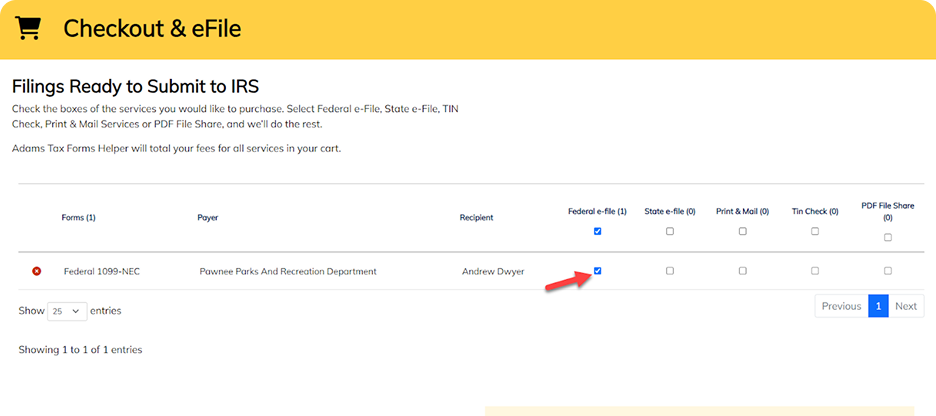
In the Checkout, select “Federal eFile” box, and any other add-on services you want to add. For example, select Print & Mail Delivery to send forms to employees and recipients by Mail Delivery, or PDF File Share to send secure PDF copies via email.
You can also choose to eFile your forms to your state at this point, if relevant.
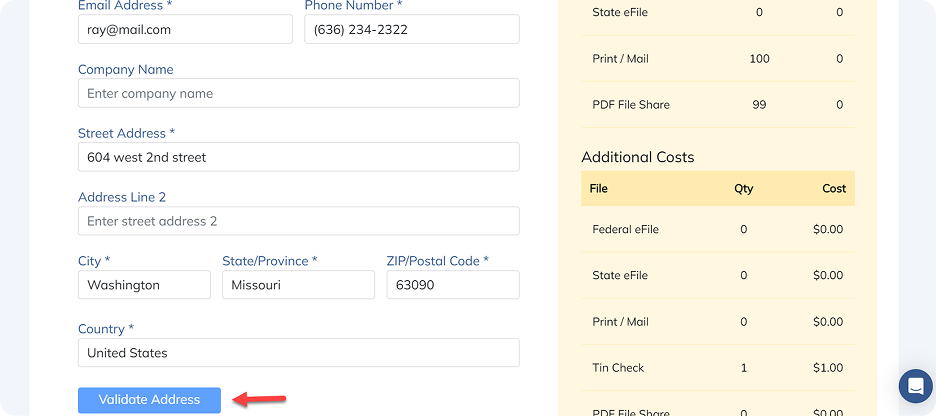
Next, confirm you agree to the Terms and Services, and then click the yellow “Checkout” button. Enter your payment details, and validate your billing address.

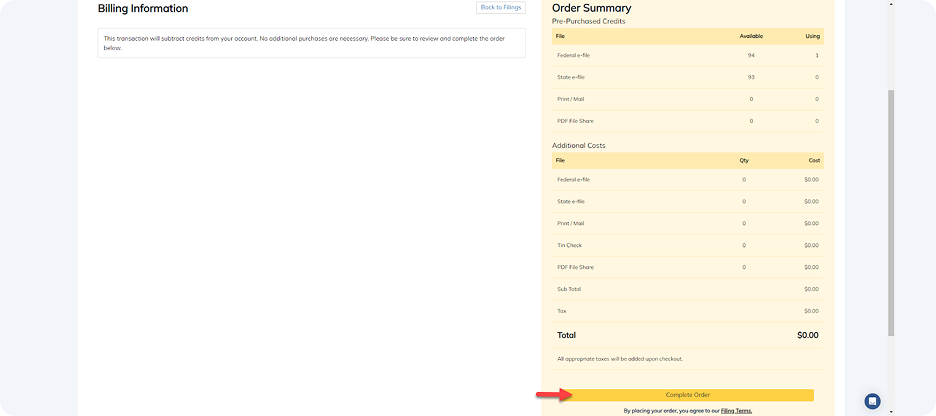
Review your order summary, and click the yellow “Complete Order” button.
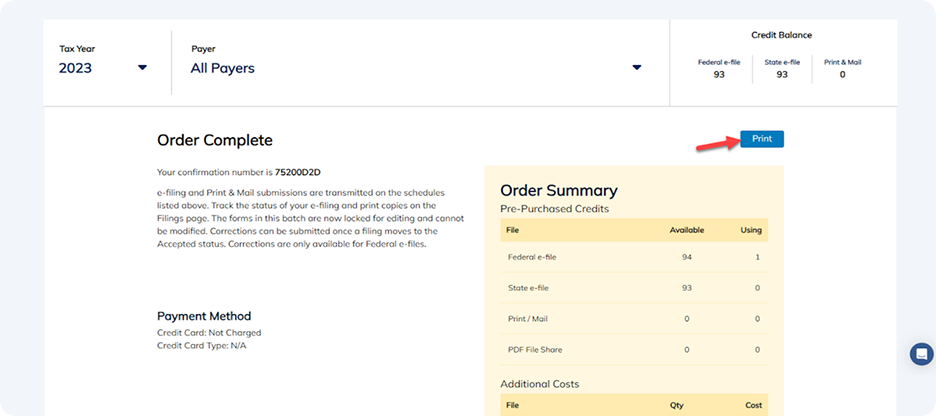
If checkout is successful, you will see your Order Summary, which you can choose to print or save for your records. Confirmation that your eFiles have been purchased, accepted, and processed will also be sent to you via email.
It can take up to four weeks for the IRS to process returns during busy periods, but your eFiling date stays the same, no matter when your returns are processed.
You can eFile your State tax forms at the same time as you eFile your Federal tax forms, provided your State accepts eFiling.
Always double-check your forms before you eFile: once your file is transferred electronically, you aren’t able to edit Form details, or update Payer or Recipient information.
To begin eFiling, go to the Forms page using the navigation bar in your Dashboard. Check the box(es) next to the form(s) you’d like to eFile, and click the yellow “Checkout & File” button.
In the Checkout, select the “State eFile” box, and any other add-on services you want to add. For example, select Print & Mail Delivery to send forms to employees and recipients by Mail Delivery, or PDF File Share to send secure PDF copies via email.
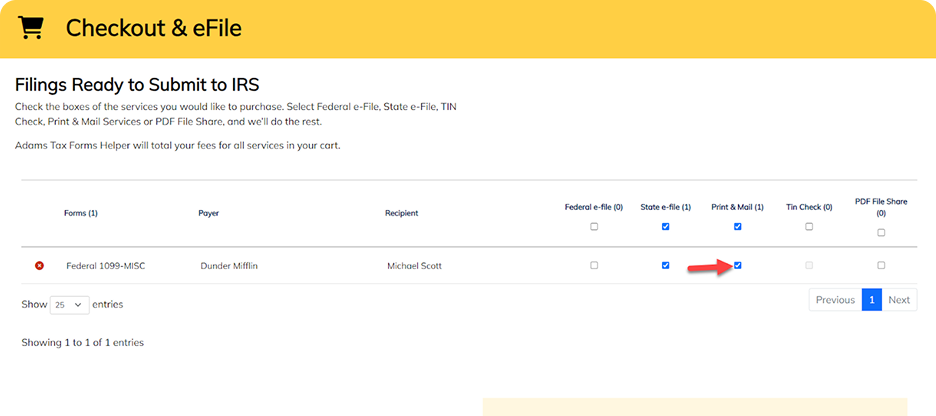
(You can also choose to eFile your Federal taxes at this point, if relevant.)
Next, confirm you agree to the Terms and Services, and then click the yellow “Checkout” button. Enter your payment details, and validate your billing address.
Review your order summary, and click the yellow “Complete Order” button.
If checkout is successful, you will see your Order Summary, which you can choose to print or save for your records. Confirmation that your eFiles have been purchased, accepted, and processed will also be sent to you via email.
It can take up to four weeks for the IRS to process returns during busy periods, but your eFiling date stays the same, no matter when your returns are processed.
You can securely share forms with recipients using our IRS-compliant Email Delivery service.
To share a form with a Recipient, they must have an email address associated with them. To add or edit a Recipient’s email address, go to the Payers page using the navigation. Click the name of the Recipient you want to edit, and add or update their email address, clicking the blue “Save” button when complete.
To share your forms as PDFs, go to the Forms page using the navigation bar. Check the box(es) next to the form(s) you’d like to share, and click the yellow “Checkout & File” button.
Next, select the Email Delivery box.
Confirm you agree to the Terms and Services, and then click the yellow “Checkout” button. Enter your payment and billing details and then click the yellow “Complete Order” button.
You can track the status of your shared form, and whether recipients have accessed their secure links, go to File Share using the navigation bar.
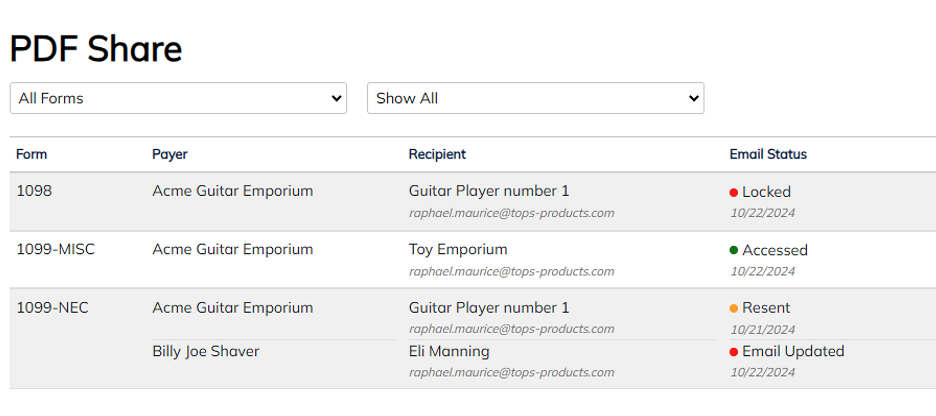
🔴 Locked means the link has expired, and needs to be resent to the Employee or Recipient.
🟢 Accessed means the Employee or Recipient has opened the link.
🟡 Resent means you have resent the Email Delivery link to your Employee or Recipient.
🔴 Email Updated means you’ve updated the email address for the Employee or Recipient, and your email delivery link is ready to be resent.
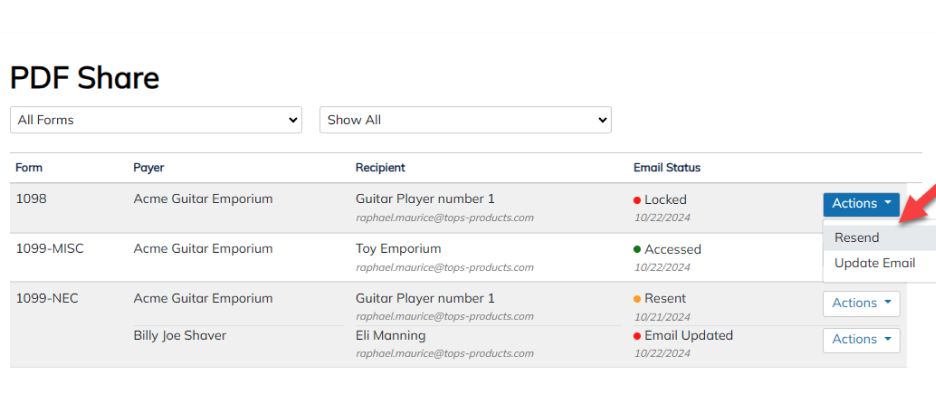
If the secure link you originally sent has expired or you want to update your Recipient’s email address and send a new link, go to File Share. Find the relevant Form and Receipt, and select “Update Email” and/or “Resend” from the “Actions” dropdown menu. Once complete, the status will update to 🟡 Resent.
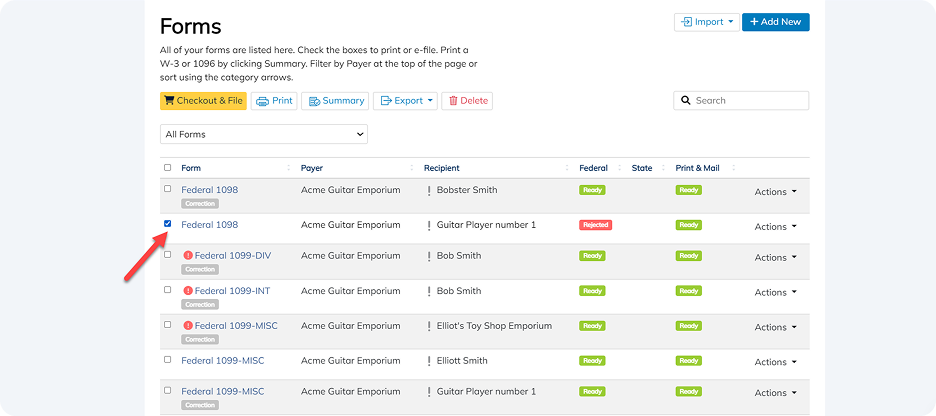
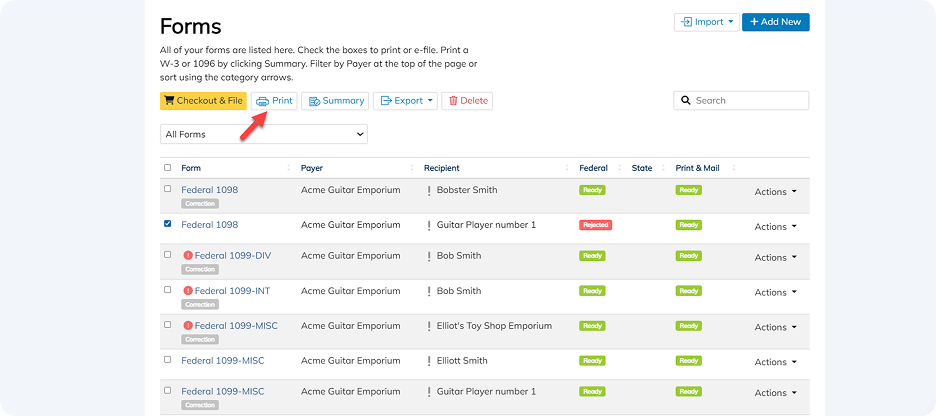
To print your forms, go to the Forms page using the navigation bar, and select the form(s) you want to print. Click the “Print” button.
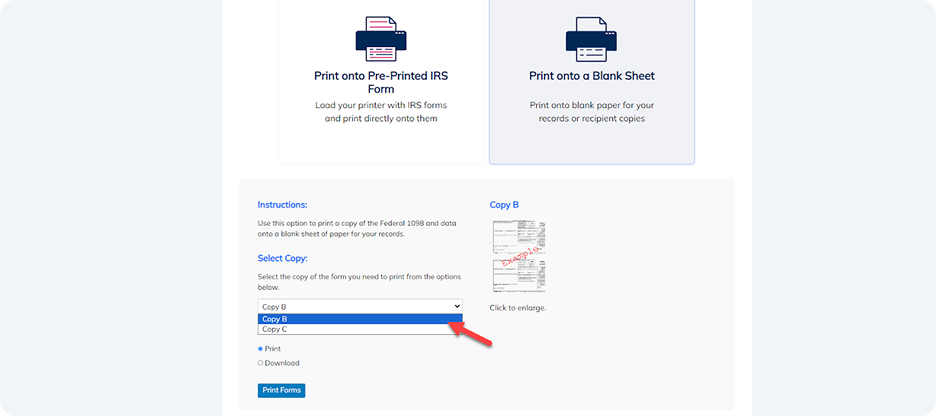
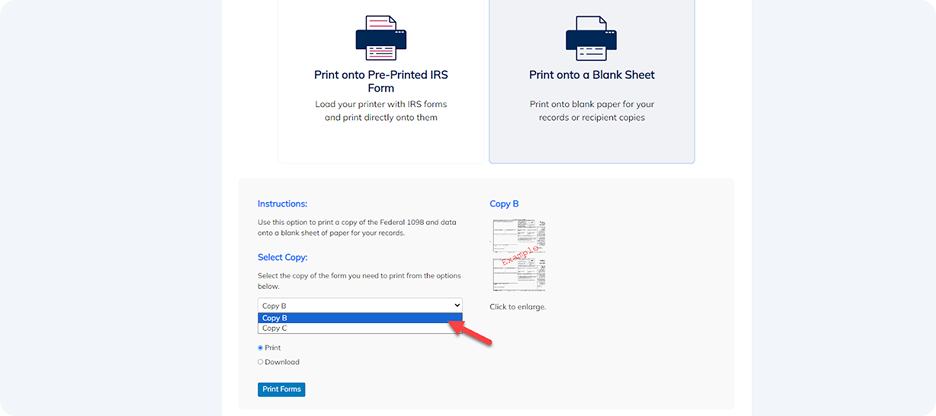
Select “Print onto a Blank Sheet” to create a hard copy either for your own records or to share with employees and recipients. (To ensure IRS compliance, these printouts are in black and white, and are not suitable for filing with the IRS or SSA.)
Select Print without Watermark if you have a Print Access code, have eFiled forms, or paid the Print Access fee. You can choose to print with watermarks when testing or for your records.
Select the Copy type (B, C, etc.) from the dropdown menu, and press the blue “Print Forms” button. (You cannot print a Copy A form when printing onto a blank sheet.)
When you see the print preview page in your browser, click the Print icon in the top right corner and follow the instructions to print.
Repeat for any other Forms that need printing, and distribute these to your Employees and Receipts as required.
Want to avoid the hassle of printing forms? We offer an Email Delivery service to help reduce the time and cost of sharing forms with Employees and Recipients. Check out our Pricing page for more information.
To print or save PDF versions of your forms, go to the Forms page of your Dashboard using the navigation bar, and select the form(s) you want to download. Click the “Print” button.
Select “Print onto a Blank Sheet” create a digital or hard copy either for your own records or to share with employees and recipients. (To ensure IRS compliance, these printouts are not watermarked, and are not suitable for filing to the IRS or SSA.)
Select the Copy type (B, C, etc) from the dropdown menu, and select either Print (for a hard copy) or Download (for a digital copy).
Decide if you’d like to mask recipient FIDS. Clicking this box will mask any Federal ID numbers for privacy.
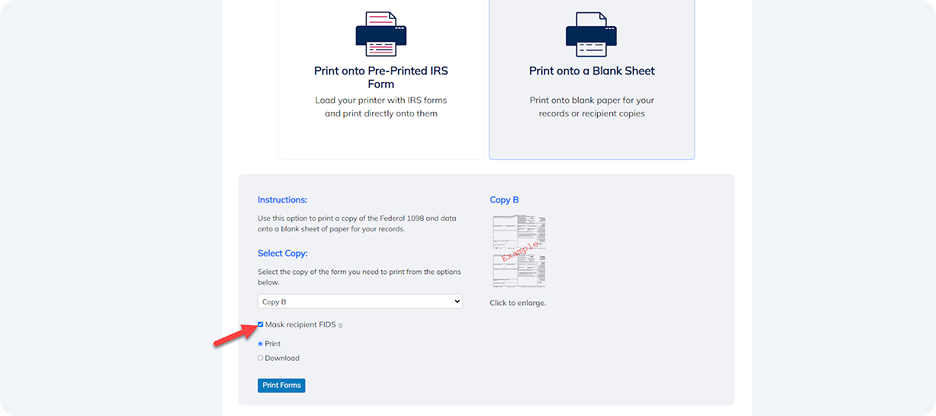
Then press the blue “Print Forms” button. (You cannot print a Copy A form when printing onto a blank sheet.)
If you selected “Print”: When you see the print preview page, click the Print icon in the top right corner and follow the instructions.
If you selected “Download”: Your form will download automatically, and can be accessed from your computer’s Downloads folder using your web browser or a dedicated PDF software like Preview (on MacOS) or Adobe Acrobat Reader [https://get.adobe.com/reader/].
When you’re printing or downloading a copy of your form(s), you’ll be prompted to select a Copy type. This information is displayed on the print page when you select an option.
Once you’ve completed an order with mail delivery service, you can track the status of your forms from the forms page. Go to the Forms page via the navigation bar, and check the Mail Delivery column for the current status of your forms.
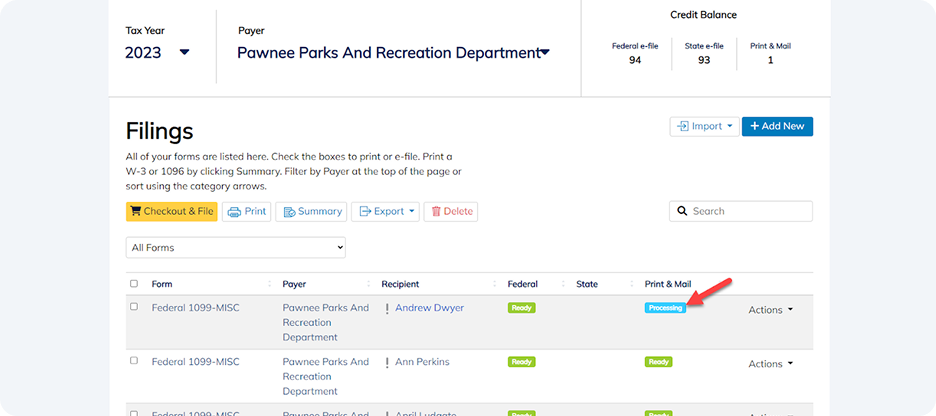
Ready means form is eligible for Mail Delivery.
Processing means the form is being batched with other forms before sending out for printing.
Submitted means the forms are at the printers.
Accepted means USPS has picked up the form for processing and delivery.
To update Recipient’s email address, go to File Share. Find the relevant Form and Receipt, and select “Update Email” from the “Actions” dropdown menu.
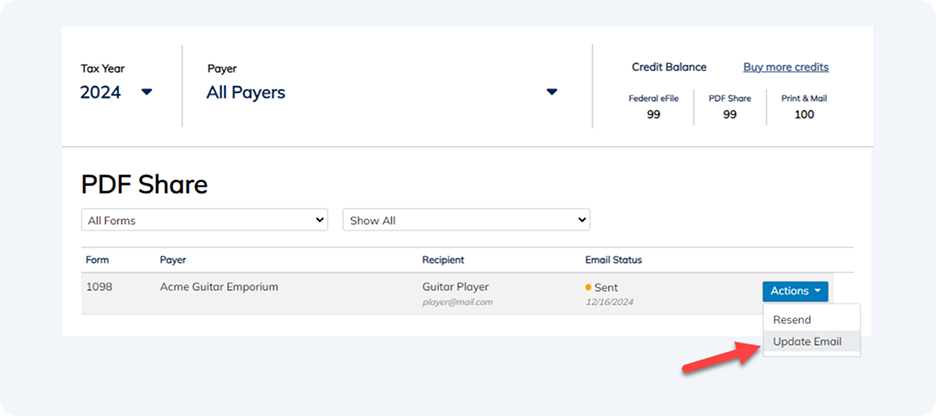
Add the new email address and click the blue “Save Changes” button. Their Email Status will update to 🔴Email Updated.
You are now ready to reshare the form. Select “Resend” from the “Actions” dropdown menu for the relevant form and recipient.
Once complete, the status will update to 🟡Resent.
Filing with paper forms
If you’ve purchased an Adams® Tax Forms Kit online or in a store, your pack contains a brightly colored sheet you’ll need to remove the watermark when printing. Sign up or log in and start filling in your forms.
Specifically, you’ll need the item number and case-sensitive access code from this sheet to activate Adams Tax Forms Helper.
If you’re a returning user, log into the Dashboard. Choose “Buy Access” when prompted, and click “Enter it here” when prompted for a code. Enter your Item Number and case-sensitive Access Code/PIN to get started.
If you’re a new user, sign up for an Adams account. When prompted, enter your Item Number and case-sensitive Access Code/PIN. Complete your registration and login again to get started.

To print your forms, you will first need to download them as PDFs. Begin by going to the Forms page using the navigation bar, and selecting the form(s) you want to download. Click the “Print” button.
Select “Print onto Pre-Printed IRS forms” to create red ink W-2 forms.
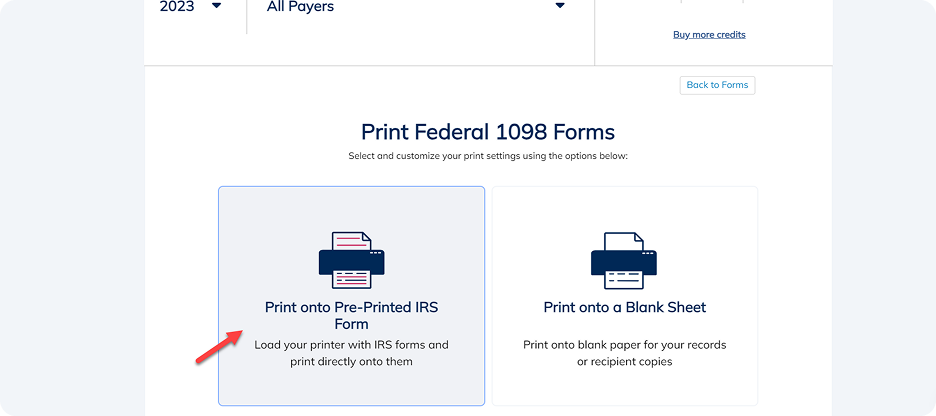
Select the Copy (A, B, C, etc.) from the dropdown menu, and check the “Download” box (not the “Print Forms” box). Your form will automatically begin downloading.
Open the file using your web browser or a dedicated PDF software like Preview (on MacOS) or Adobe Acrobat Reader [https://get.adobe.com/reader/]. Click the Print icon, go to File > Print, or use a keyboard shortcut (Ctrl + P for Windows, Command + P for MacOS) to Print your forms.
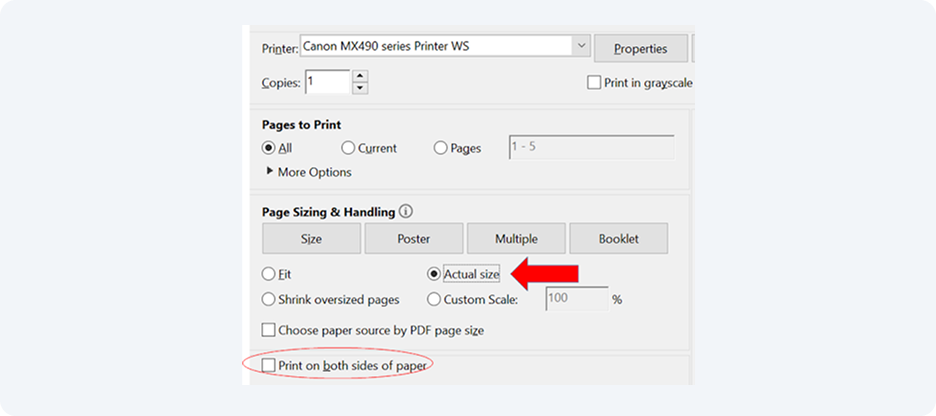
Adjust your print settings as necessary:
- Under Page Size & Handling, select “Actual Size” (100%)
- Unselect the “Print on both sides” checkbox
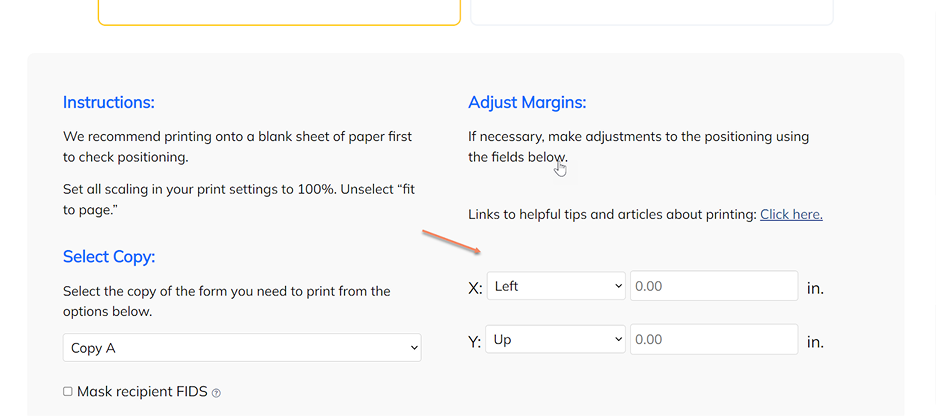
We recommend running a test print on plain paper first to check positioning.
If you find the alignment is slightly off, go back to your Dashboard and adjust the margins of your download as necessary.
When you’re ready, print onto the blank form from your Adams® Tax Forms Kit, and complete your filing.
No. Plain ink copies are perfect for your own or your recipient’s records, but not suitable for sending to the IRS or SSA.
Official IRS copies must be scannable, meaning they’re printed with a special red ink that can be read by Optical Character Recognition (OCR) technology. Sending plain ink tax forms to federal agencies may cause delays or incur penalties.
If you plan to mail your taxes to the IRS or SSA, you must send scannable forms with Flint red OCR dropout ink for your Copy A forms and your accompanying summary transmittals.
Managing your account
To change your password, select “Forgot Password” on the login page. Enter the email address associated with your Adams Tax Forms Helper account and click “Email Verification Code.” We’ll email you a 6-digit verification code.
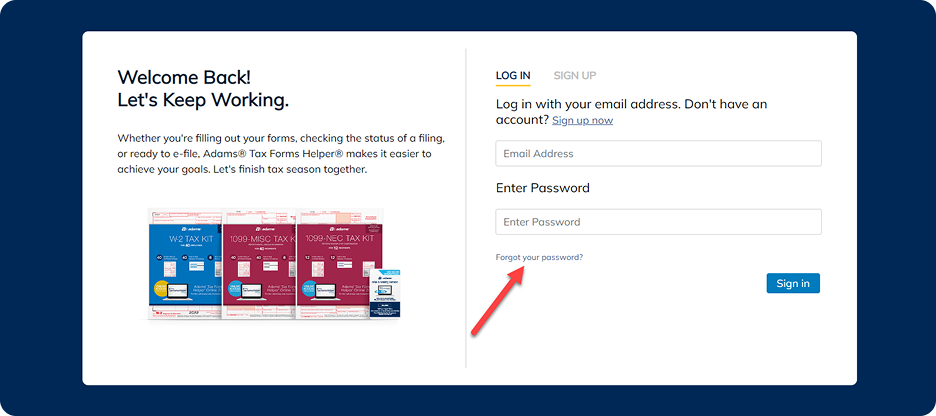
(You may need to check your Spam or Junk folder, if it doesn’t automatically come through to your inbox.)

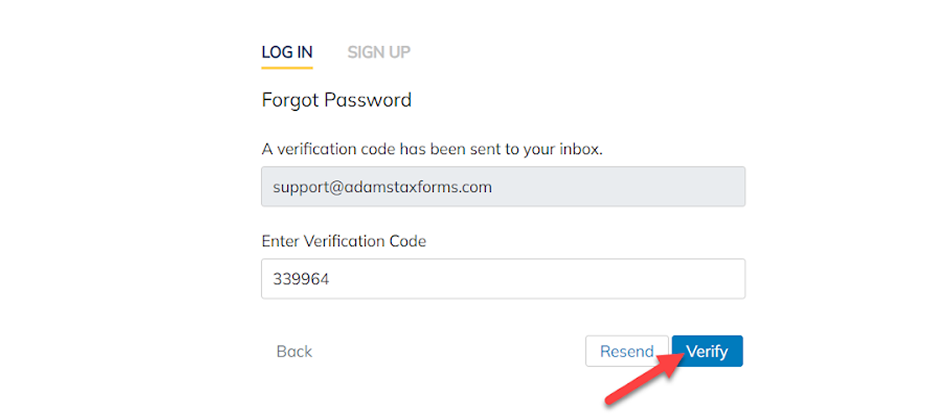
Enter the 6-digital code into the Verification Code box and press “Verify”. Enter and confirm your new password, and press “Save”.
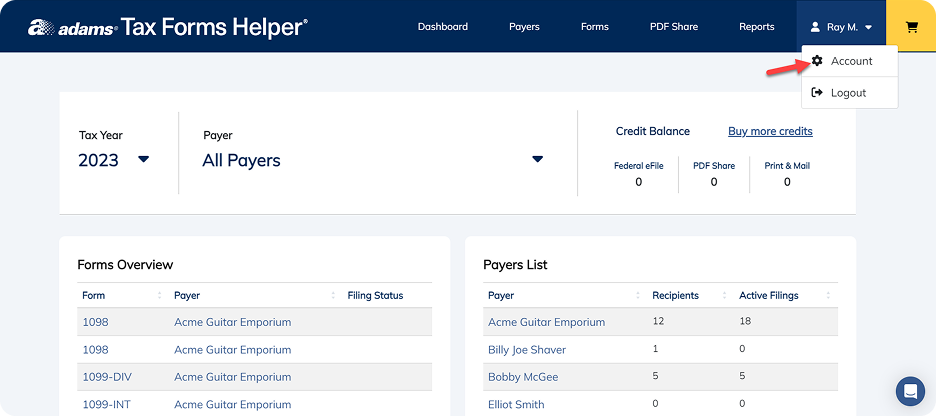
In your Dashboard, click your name in the upper-right-hand corner and select “Account” from the dropdown menu.
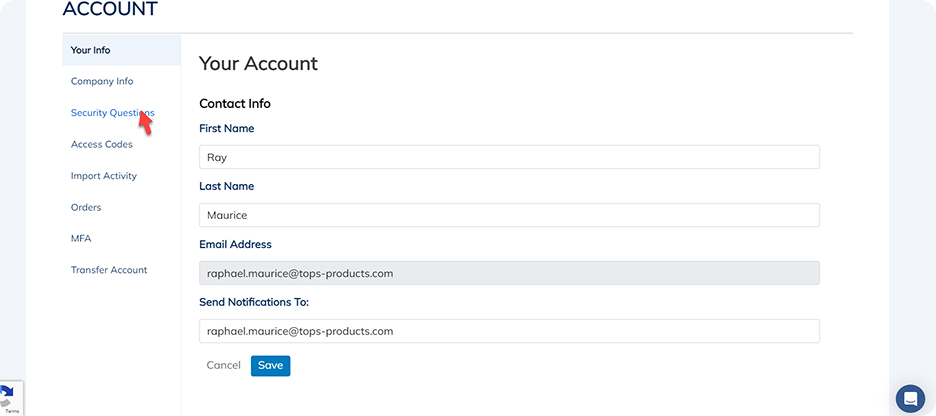
Click on “Security Questions” in the sidebar, and update your security questions and answers. When complete, press “Save”.

To change where you receive notifications, in your Dashboard, click your name in the upper-right-hand corner and select “Account” from the dropdown menu. Scroll down to the “Send Notifications To” field, and update the email address.

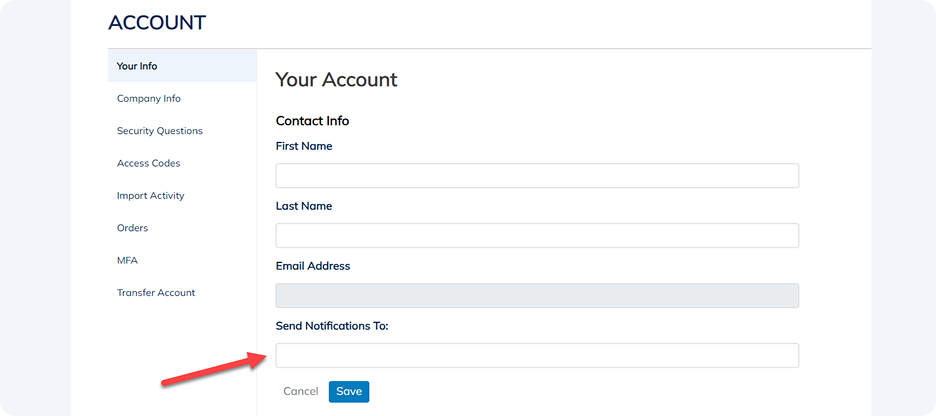
When complete, press “Save”.
(This process does not change your 2-Factor Authentication email, or the email you log in with. Changing the notifications email address will only change where receipts, order and status updates, etc., are sent.)
Adams® Tax Forms Helper® requires all users to set up 2-Factor Authentication when they create their account.
To change the SMS phone number or email address where we send your 2FA code during login (not your account email address), in your Dashboard, click your name in the upper-right-hand corner and select “Account” from the dropdown menu.
Scroll down to the section called “Update Two-Factor Authentication”. Select your preferred method of 2FA (Phone or Email), and add your nominated phone number or email address. When complete, click “Update.


(If you want to verify by Phone, make sure your phone number is capable of receiving SMS text messages.)
Verify the 6-digit 2FA code we send to your new phone number or email address and click “Update”.
When logging in, your 2FA code will expire after 60 minutes. You have up to 5 attempts to enter it correctly. If you get locked out of your account, you'll need to wait 5 minutes before attempting to log in again.
If you didn’t receive a code, you can click “Resend” on the 2FA screen. If you don’t have access to your phone for verification via SMS, you can reach out through our chat support to change your 2FA to email or a new phone number.
%20isn%E2%80%99t%20working_.png)
If you’re still having trouble, chat with us. Use “verification code” in your message and our Customer Service team can help.
If you get a text with an authentication code that you didn’t request, it may mean an unauthorized user is attempting to access your account.
- Login and change your password to protect your Adams Tax Forms Helper Online account.
- It may be a good idea to update any of your other password accounts that aren’t protected by 2-Factor Authentication to keep them safe as well.
If you’re retiring or leaving a company, you can transfer your account to someone else. This process will copy the data from your account to a new account, and all data will be deleted from the old account. It may also result in a loss of transaction history.
In your Dashboard, click your name in the upper-right-hand corner and select “Account” from the dropdown menu. Select “Transfer Account” from the sidebar and fill in the email address you want to transfer the account to in the “Transfer to Email” field.

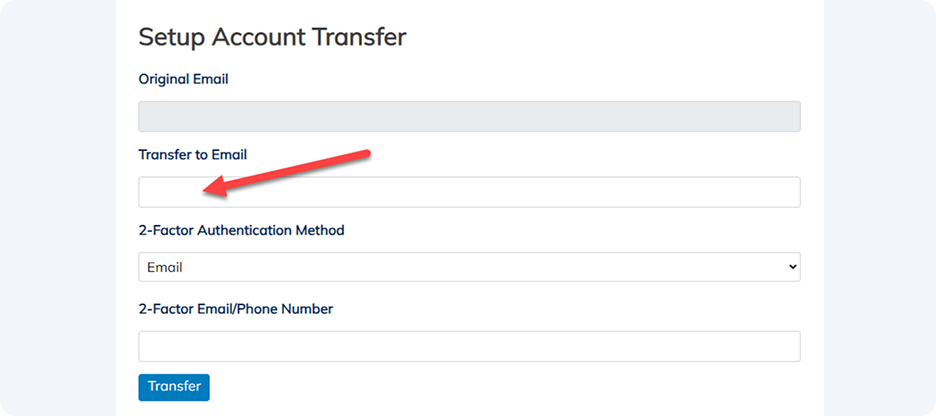
This email address will become the username for the account, and notification emails will be sent to this address. (This email address cannot already be associated with a Tax Forms Helper account.)
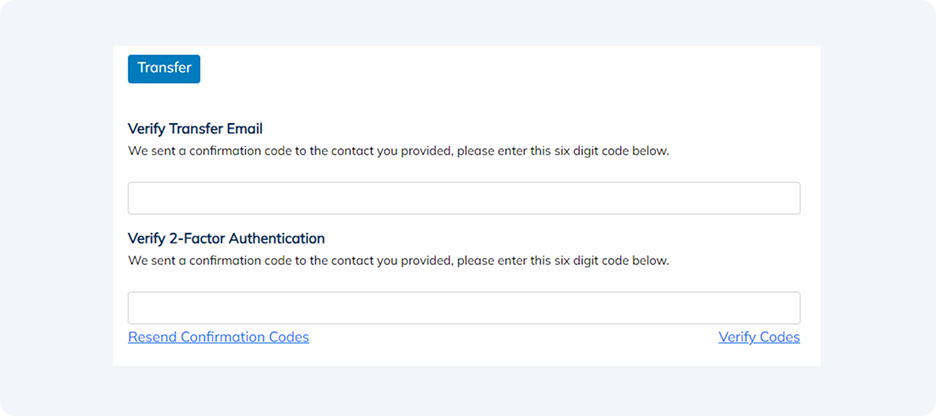
Next, set up 2-Factor Authentication for the person you are transferring the account to. We recommend SMS text messages as the most secure option. Make sure the phone number you enter can receive SMS text messages.
Click “Transfer” to initiate the account transfer process. You will be prompted to enter authentication codes for the new account. Contact the person you are transferring the account to for these codes. Click “Verify Codes” when you're ready to complete the process. Once complete, you will be signed out from your account.

The person you transferred the account to now needs to use the Forgot Password process to set up a new password for the transferred account.
Glossary
2FA - 2 Factor Authentication
AES - Advanced Encryption Standard
CPA - Certified Public Accountant
CSV - Comma Separated Values
IRS - Internal Review Service
PDF - Portable Document Format
SSA - Social Security Administration
SSAE-18 - Statement on Standards for Attestation Engagements No. 18
TCC - Transmitter Control Codes
TIN - Taxpayer Identification Number
TLS - Transport Layer Security
Looking for an answer to
a different question?
Contact support